

Give a module or feature a screen template
A screen template is a layout that screens share: where the header goes, where the filter sits and where the list is drawn. Instead of laying out every screen of the Storefront by hand, you choose a template once on the module or the feature, and every screen below it is drawn with it.
How templates are inherited
Section titled “How templates are inherited”A template chosen on a level applies to everything below it, unless a lower level chooses its own:
application root template → module → feature → slice
A feature in the Storefront module that sets no template uses the module’s. A slice that sets no template uses its feature’s. The header of each level says where its template comes from, for example Using ProductGrid, inherited from the module.
Screens that are pages are always framed by the application’s own root template or shell as well. That one is not chosen on the board but in the UI profile. The header says so and offers Open the UI profile.
Before you start
Section titled “Before you start”- A module or a feature on the board. See Modules and features.
- To use a blueprint’s templates, the blueprint must be part of the application’s UI profile. See UI profile, blueprints and themes.
Choose a template for a module or a feature
Section titled “Choose a template for a module or a feature”-
In the header of the module or the feature, select the Screen Template icon to open its screen template section. It is titled Template of this module or Template of this feature. If nothing is chosen, it reads No template.
-
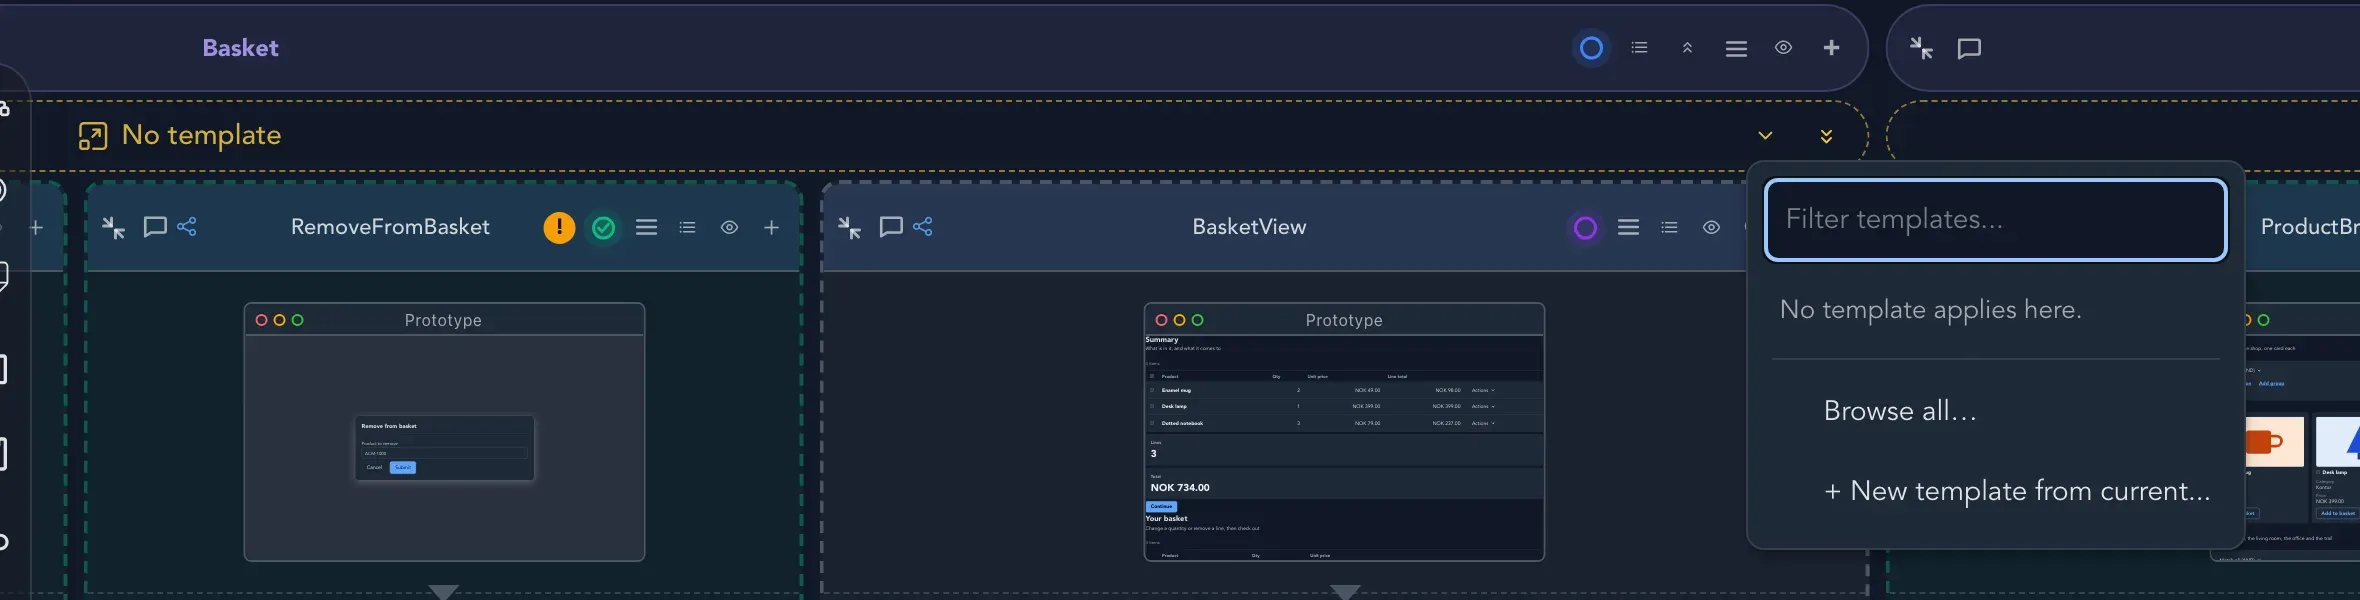
Select Choose a template (or the arrow at the right of the No template bar). The picker opens with Filter templates… at the top. It lists My templates, your own, and Blueprints, the ready-made ones, that fit the level. When none fits, it says No template applies here. Below the list are Browse all… and New template from current….
-
Select a template. The header shows a preview of it and says Using that template.
-
To go back to what the level above uses, select Use the inherited template.
If a template is later removed, or no longer fits the level, the header says so, and you can choose another or go back to the inherited one.
Change what the screens contain
Section titled “Change what the screens contain”The header has two ways to design the template’s content, and they differ in who shares the change:
- Design the content opens the template designer. Every level that chose this template shares your change.
- Customize the content makes a template of its own for this level from the one in use, chooses it here, and opens the designer on it. Only this level changes.
In the designer you drag components into the slots of the template, the same way as in the screen editor.
Hook a state change into a template
Section titled “Hook a state change into a template”A template can have outlets, places that the screens below it fill, such as a place for actions. A level can hook a state change into an outlet of its template: select Hook a state change into the outlet, then Find a state change. A level can only hook into the outlets that its template offers. If it offers none, the header says so and you can Add an outlet to the template.
Browse all templates
Section titled “Browse all templates”Select Browse the gallery in the header, or Browse all… in the picker, to open Templates: every template you can build screens from, yours to manage and those of every blueprint to browse, preview and copy.
- Narrow the list by Category, or under Where templates come from choose All templates, My templates or Blueprints.
- Select a template to see its facts in the pane: the blueprint it belongs to, the category, the levels it fits, the slice kinds, the license and the kind of template: Shell, Screen template or Dialog template.
- A preview shows it as Populated, Empty, Loading or Error, at Desktop, Tablet or Phone width. Preview the whole blueprint shows a blueprint’s whole application.
- Badges tell you more: Mine, Blueprint, In use, Blueprint not added and Does not fit here. For a template that does not fit, the pane says why.
What you can do with a template:
| Action | When |
|---|---|
| Use this template | Choose it for the level you came from. |
| Copy to my templates | Take a blueprint template as your own, so that you can change it. |
| Add blueprint to this application | The template belongs to a blueprint that is not part of the application yet. You can look at it first. |
| New template, Edit, Rename, Duplicate | Make and change templates of your own. |
| Delete | Remove one of your templates. Anything still using it no longer finds it, and this cannot be undone. |
| Import and Export | Bring a template in from a file, or take one out. |
Check that it worked
Section titled “Check that it worked”The header of the module or the feature says Using your template, and the screens below it are drawn with it. Preview them to see.
What happens next
Section titled “What happens next”- Preview screens with sample data.
- Set the look of every template in the UI profile.
- Read about the idea in Screens and personas.