

Given contexts and seed data
Two canvases hold the starting points of your model. Given contexts name the situations that specifications begin from. Seed data says what a brand-new application starts with. Both are written once per domain and reused.
Given contexts
Section titled “Given contexts”A specification reads given this has happened, when this is done, then this follows. A given context is one of those givens with a name: either the events that have already happened, or the state a read model is in. Every specification that starts from the same place uses the context by name, instead of spelling the same history out again.
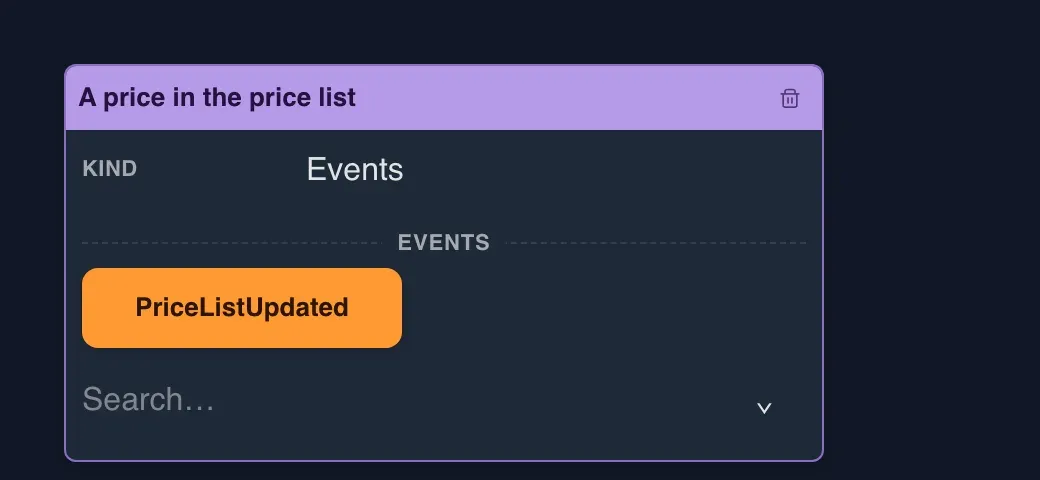
Add a context of events
Section titled “Add a context of events”- In the project drawer, expand your domain and select Given contexts.
- Select Add Given Context in the toolbar. A card named New given context appears. Its Kind says Events.
- Double-click the name and say what the situation is, for example
Basket with two items. A name is unique within the domain, ignoring case. - Under Events, open the Add event list. It shows every event of every event model in the domain, each with its model and slice. Choose one and it joins the context.
- Under each event, select Edit values, fill in what the event carried, and select Save values. Select Cancel to leave the values as they were.
The same event can be in a context more than once, so a basket with two items has the item-added event twice. The list is the order the events happened in, and new events are added at the end. To take an event out, select Remove event. Every change is saved as you make it.
Add a context of a read model state
Section titled “Add a context of a read model state”Some specifications begin with a state rather than a history. They describe a view, and a view is specified by the read model it starts from.
- Select Add Read Model Context in the toolbar. Its Kind says Read model.
- Use Select read model to choose one of the domain’s read models. A context holds exactly one, and choosing another replaces the first and clears its values.
- Select Edit values and set the state the read model is in when the specification starts, then Save values.
Use a context in a specification
Section titled “Use a context in a specification”On the event model board, open a specification’s Given section.
- On a state change slice, select Use given context beside the given events. It offers the events contexts of the domain. A specification can use several.
- On a state view slice, the button offers the read model contexts. A view uses one. Once it uses a context, or has a read model of its own, the button is disabled.
- An automation slice offers no contexts.
The context’s name on the specification opens it on this canvas. The cross beside the name, Remove context, stops the specification using it. The context stays on the canvas.
When a specification runs, and when the model is exported as Screenplay, the contexts it uses are spelled out into its given. An events context contributes its events first, in the order the context lists them. If a context cannot be spelled out, the run stops with a message that names the specification and the problem, rather than quietly ignoring it. A specification that used a deleted context shows Deleted context until you take it off.
Because a context is written once and spelled out each time, editing it changes every specification that uses it. That is the point, and the reason to keep each context to one situation.
To remove a context, use Delete given context in its header and confirm, because specifications may be using it.
Seed data
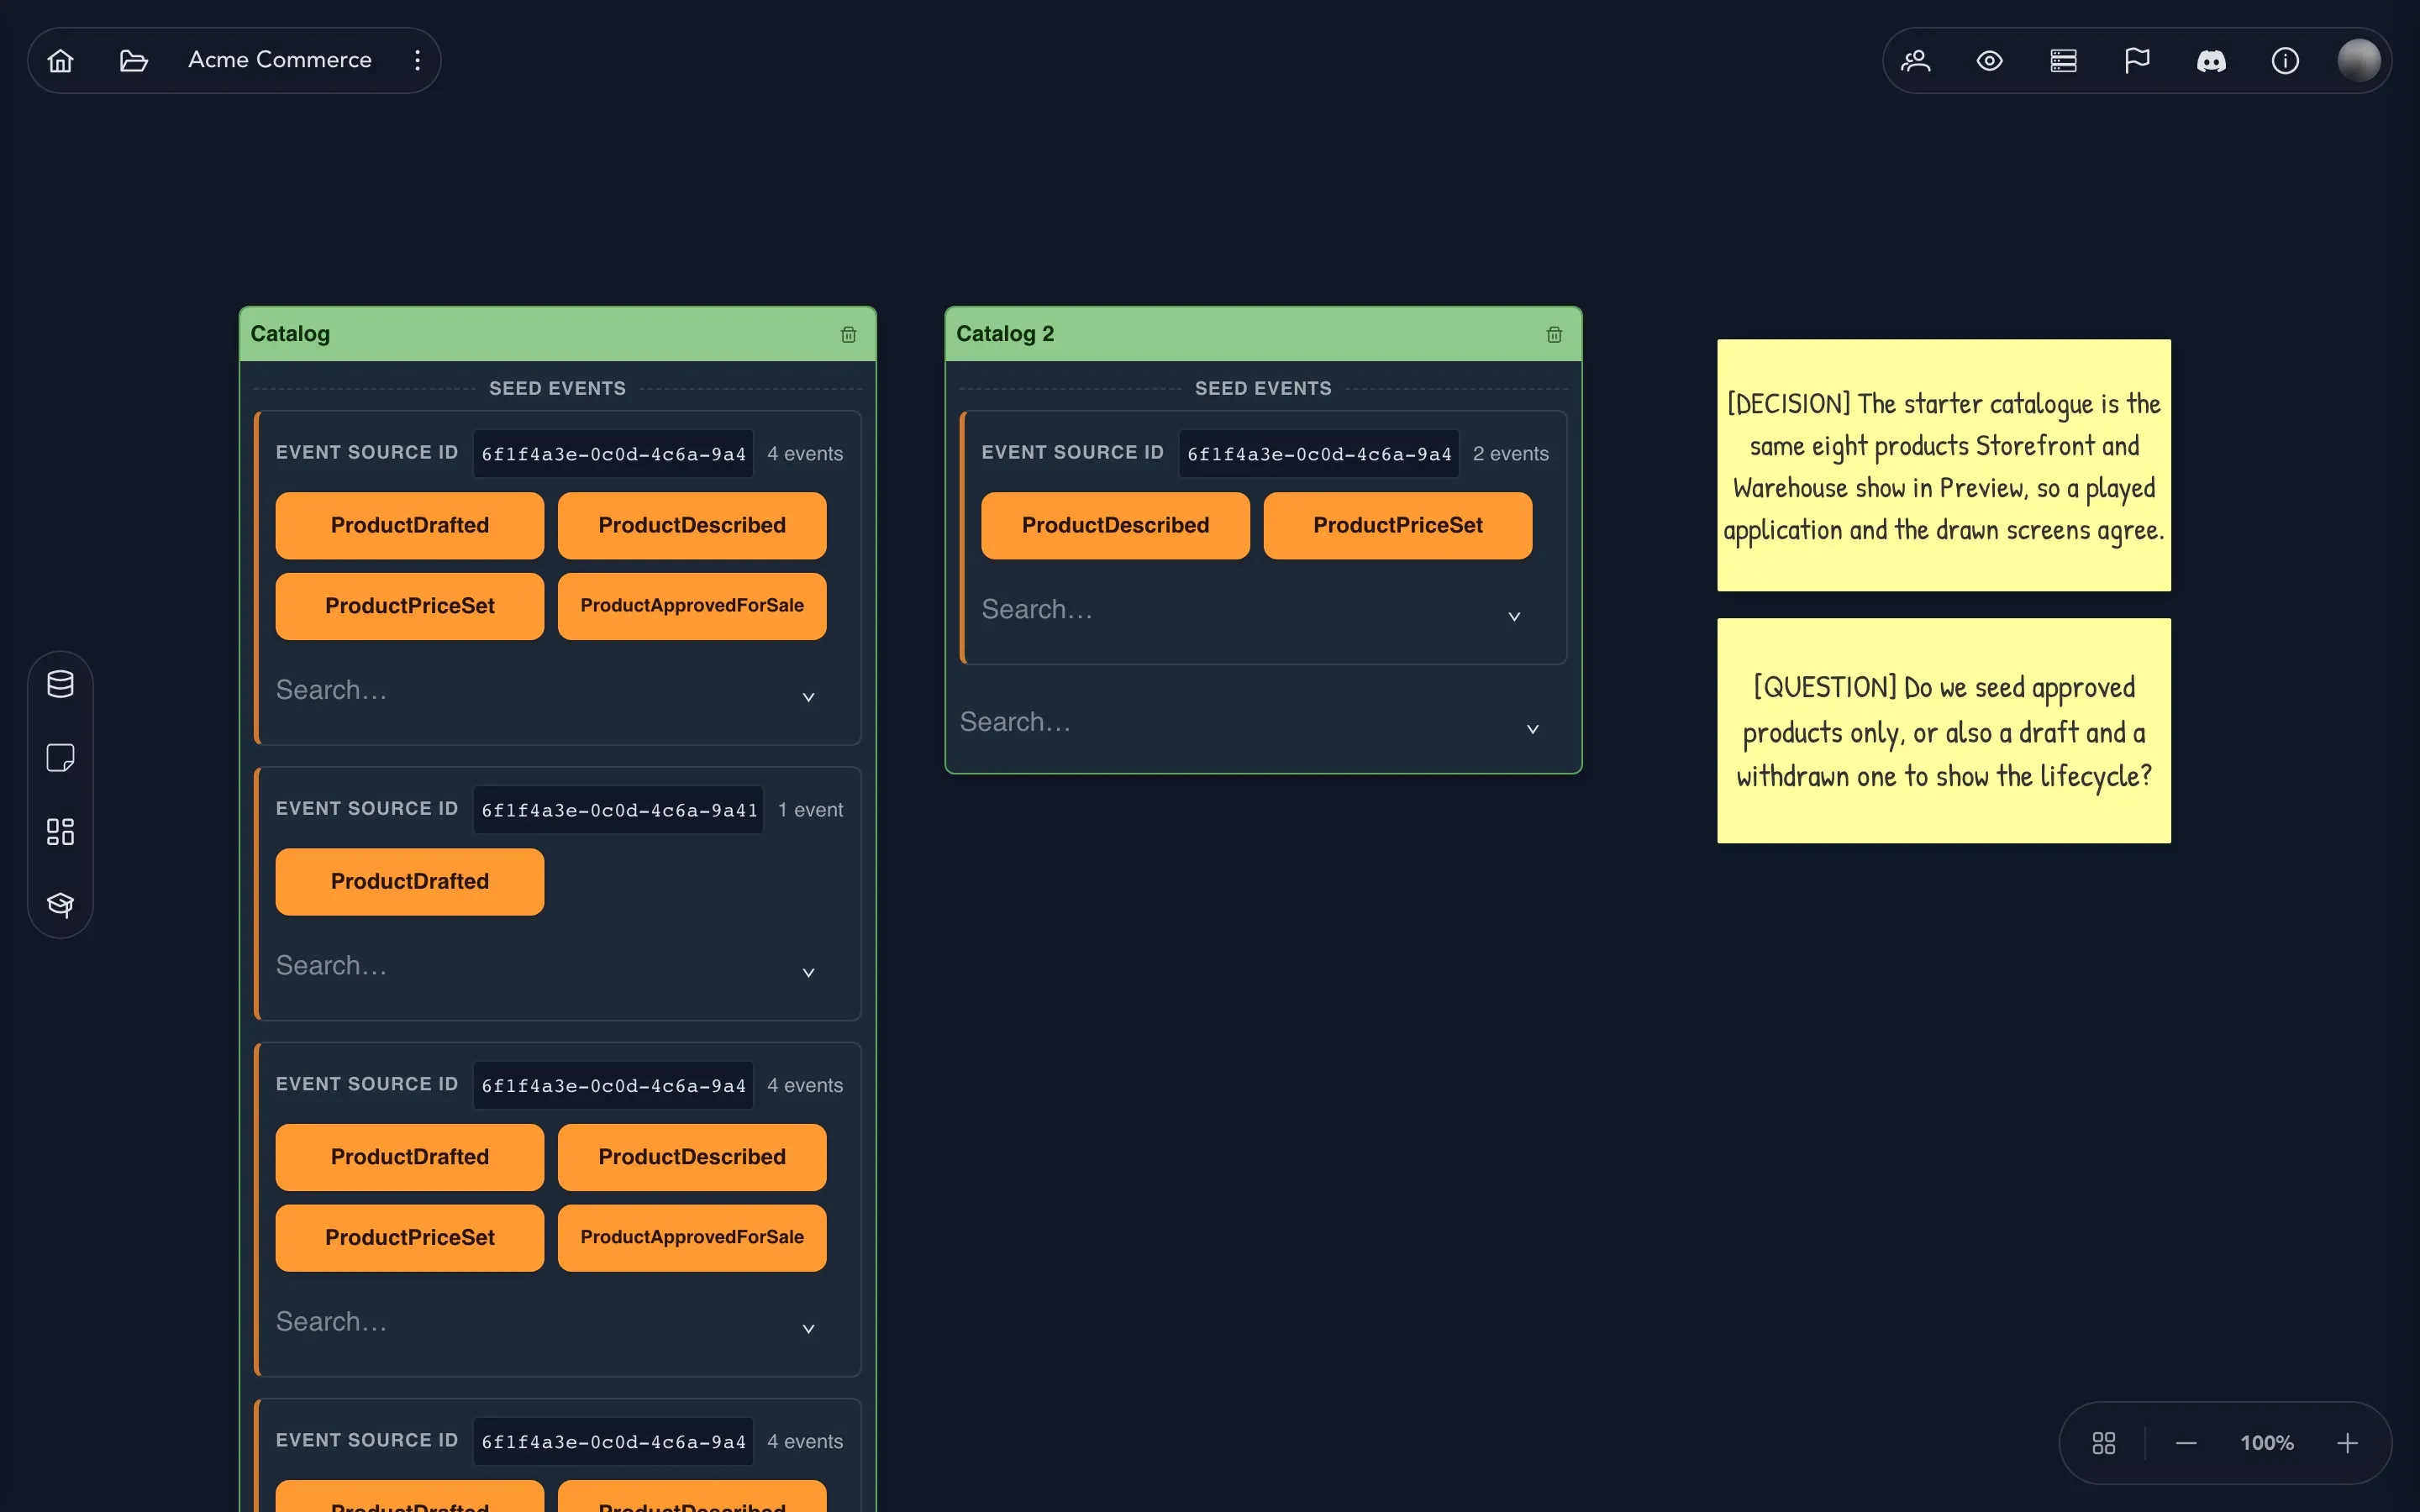
Section titled “Seed data”Seed data answers one question: what does this application start with? It is organized in collections. A collection is a named set of events that belong together, such as the products the catalog starts with, and each is a card of its own.
Add a collection
Section titled “Add a collection”- In the project drawer, expand your domain and select Seed data.
- Select Add Seed Data Collection in the toolbar. A card named New seed data appears.
- Double-click the name and say what it holds, such as
Starter cart. Names are unique in a domain, ignoring case. - In the card, select Add seed event for a new event source id and choose from every event of every event model in the domain. Type in the search field to narrow a long list.
- Each event lands as a row with its name, the Event source id it happens to (a new row gets a fresh one) and its values, which start as No values set. Select Edit values, fill them in and select Save values.
Events stay in the order you added them, which is the order the application starts with them. To put an event into the same basket or product as another, select Add seed event to this event source id in that group instead. The bin on a row removes just that event. The bin in the card’s header removes the whole collection after a confirmation.
If an event is later removed from its event model, its row says Missing catalog event and keeps the name it was recorded with.
Arrange both canvases
Section titled “Arrange both canvases”Drag a card by its header to place it. Arrange, the last button on the toolbar, lays out every card and note. Add Sticky Note keeps unsettled thinking beside the cards: Do we seed approved products only, or also a draft and a withdrawn one?