

Add and manage slices
A slice is one behavior of the system, drawn as one column. Here you add one, learn what the four types are for, and move it, hand it to someone and mark how far along it is. The idea behind slices is in Slices.
Add a slice
Section titled “Add a slice”-
In the header of the feature, select Add (the + button).
-
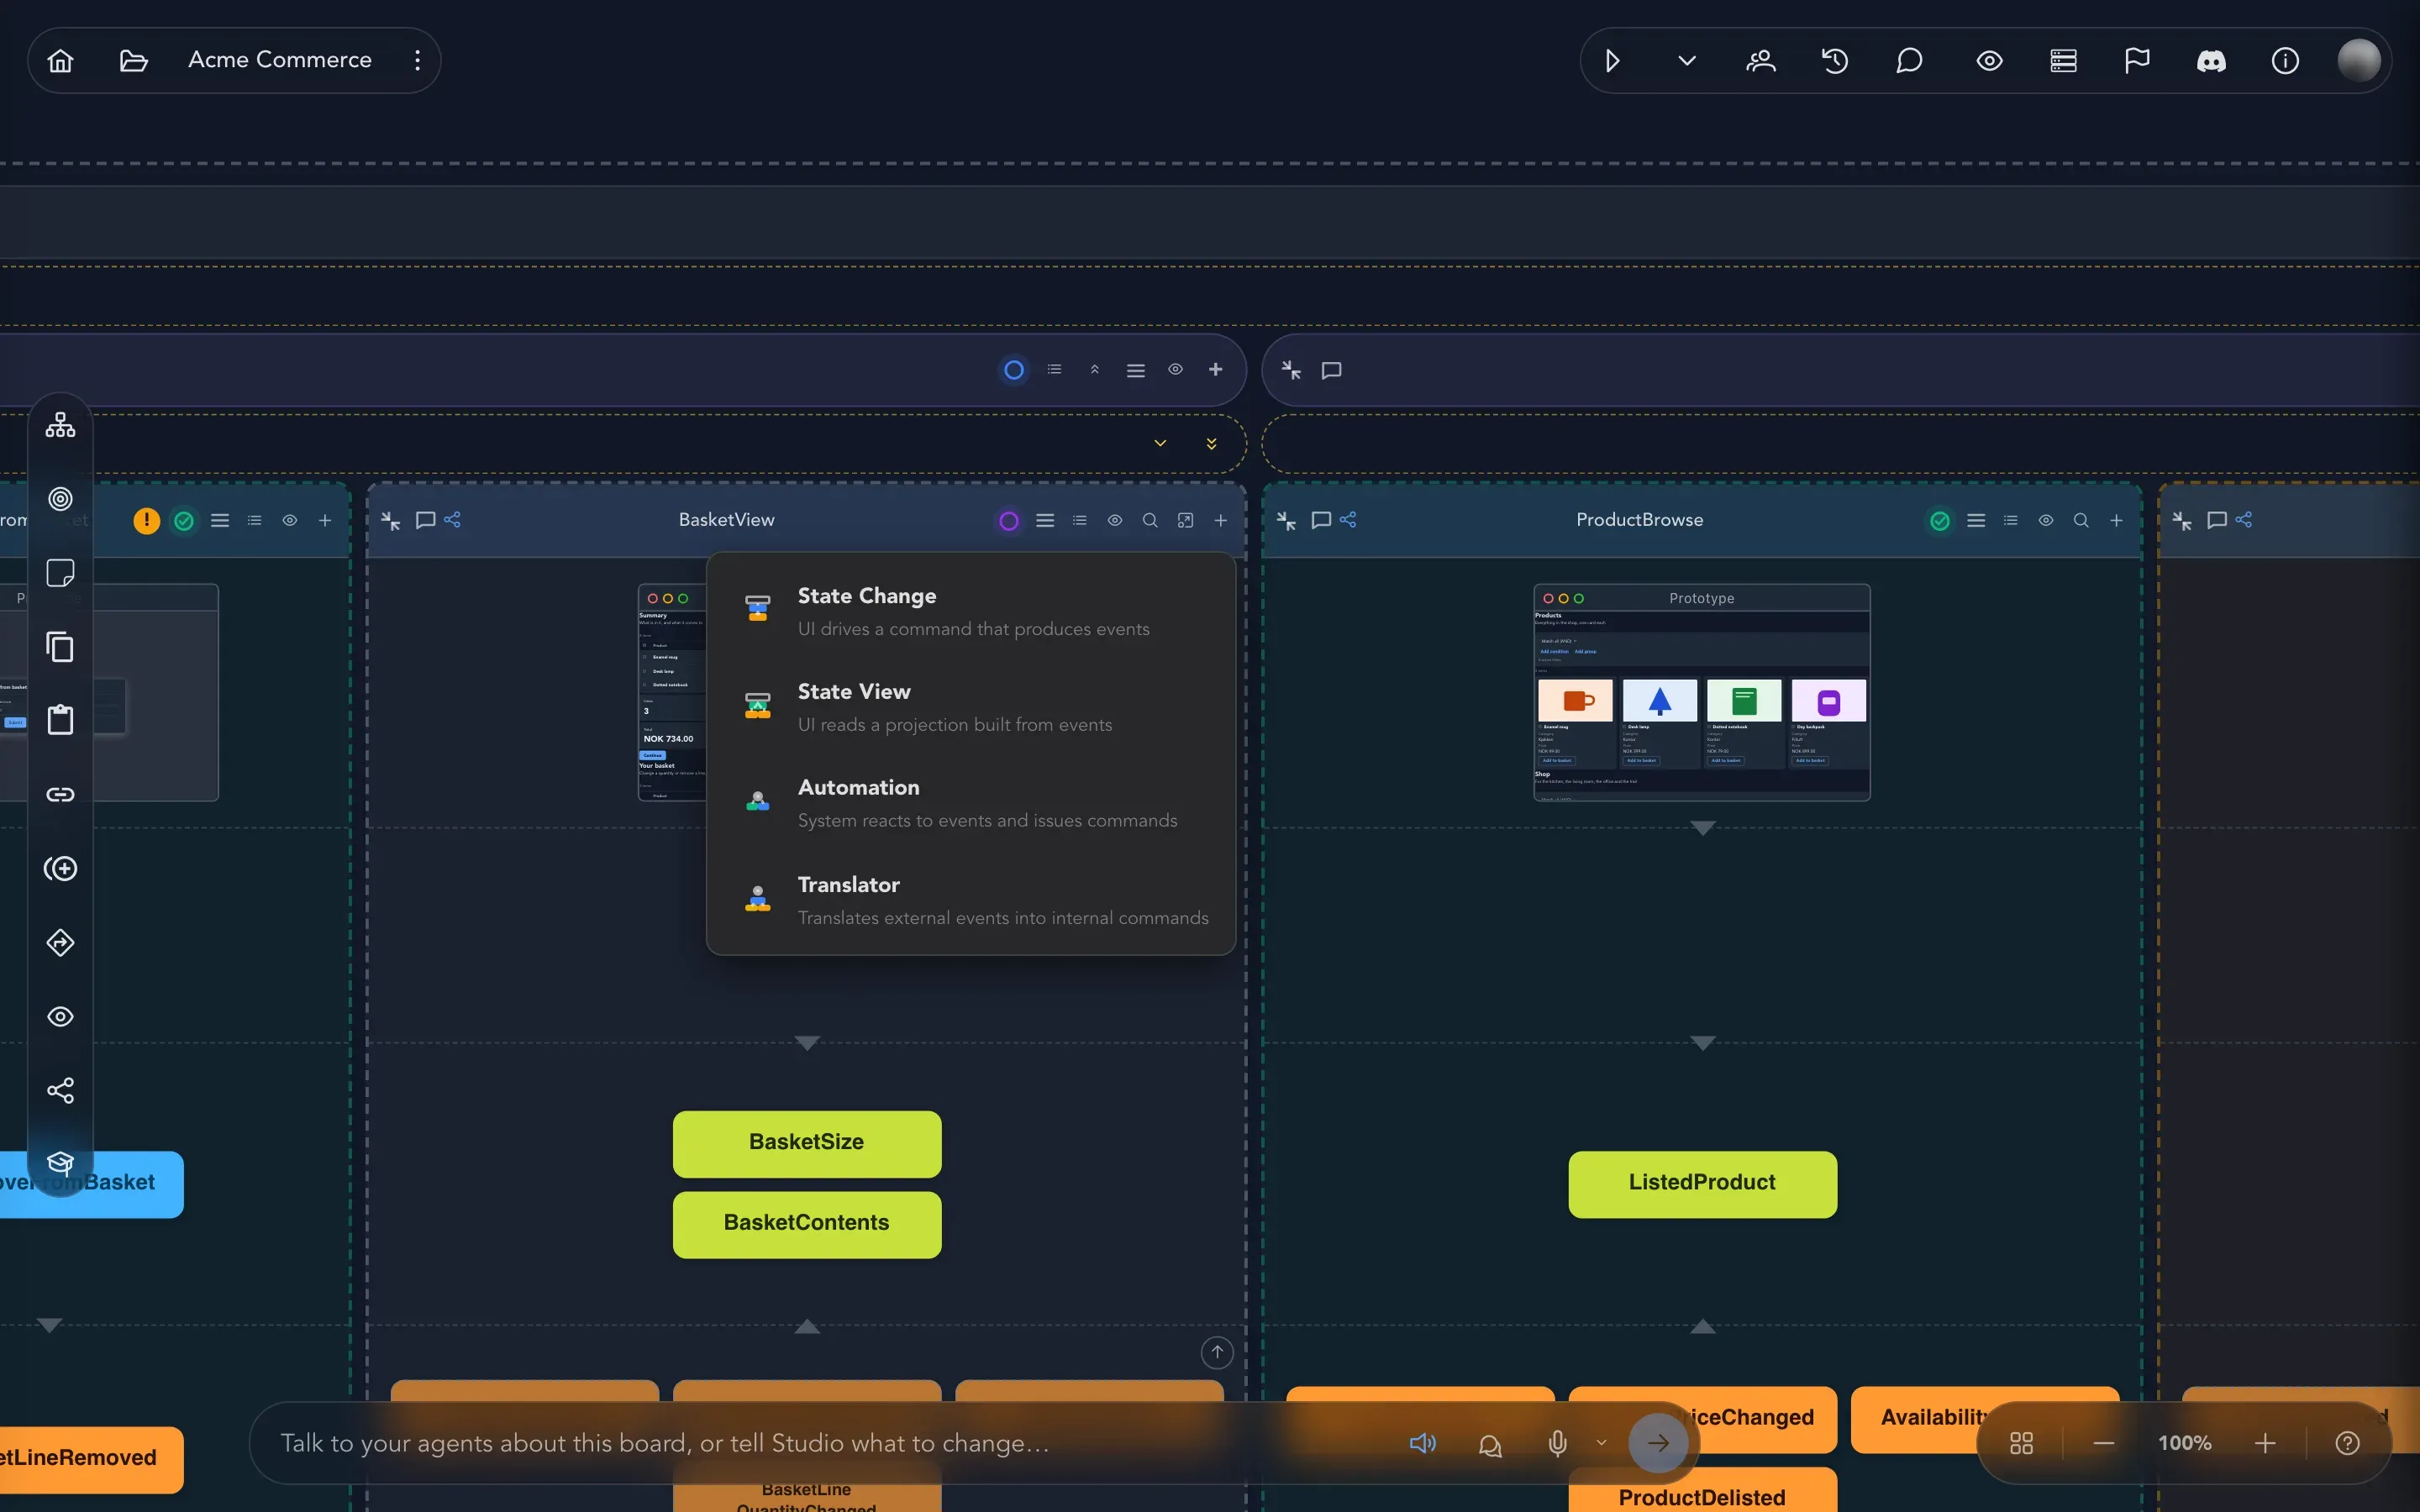
Choose Add Slice. Studio asks you to Choose a vertical slice type.
-
Pick the type that fits the behavior (see the table below). The new slice appears in the feature.
-
Double-click the slice’s name to rename it.
Choose a slice type
Section titled “Choose a slice type”| Type | Studio describes it as | Choose it when | Acme Commerce example |
|---|---|---|---|
| State Change | UI drives a command that produces events | A person asks for something and facts are recorded | AddToBasket |
| State View | UI reads a projection built from events | A person looks at something built from earlier facts | BasketView |
| Automation | System reacts to events and issues commands | The system should act on its own | EmptyBasketAfterCheckout |
| Translator | Translates external events into internal commands | Facts cross the border of an area or an application | ListProduct |
What goes inside each type is in Commands and rules, Read models, projections and queries, Automations and Translations and public events.
Put slices in order
Section titled “Put slices in order”Drag a slice to reorder it. Because the board reads left to right as time, Studio refuses a drop that would put a view before the events it reads. It tells you These events are not produced before this position, and lists them.
Use the slice options
Section titled “Use the slice options”Select Slice options in the slice header.
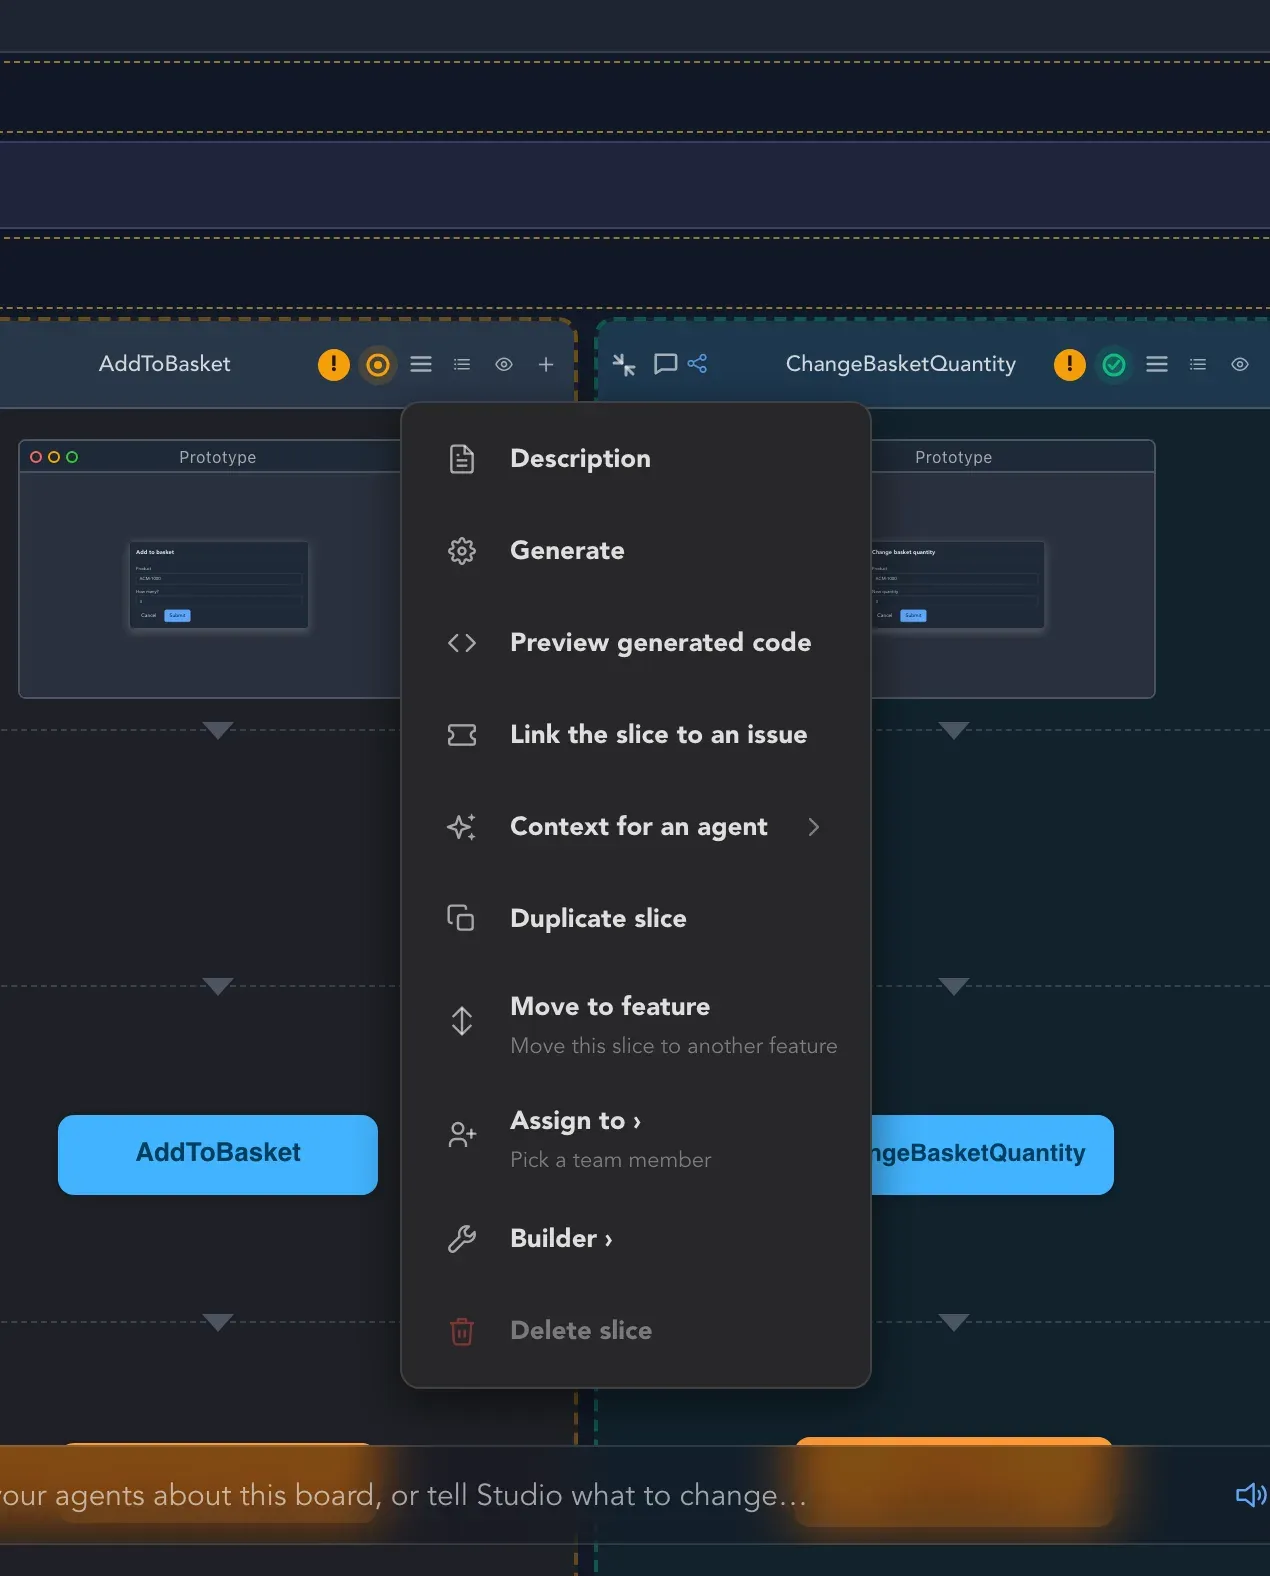
| Choose | To |
|---|---|
| Description | Write what the slice is for. |
| Generate | Let AI fill in the slice. See Work with AI. |
| Preview generated code | See the code Studio would generate for this slice. See Build and deliver. |
| Link the slice to an issue | Connect the slice to an issue in your tracker. See Link slices to issues. |
| Context for an agent | Copy or download the slice as Markdown, JSON, YAML or TOON, to give to an external AI tool. |
| Duplicate slice | Make a copy next to it. See Copy, paste and duplicate. |
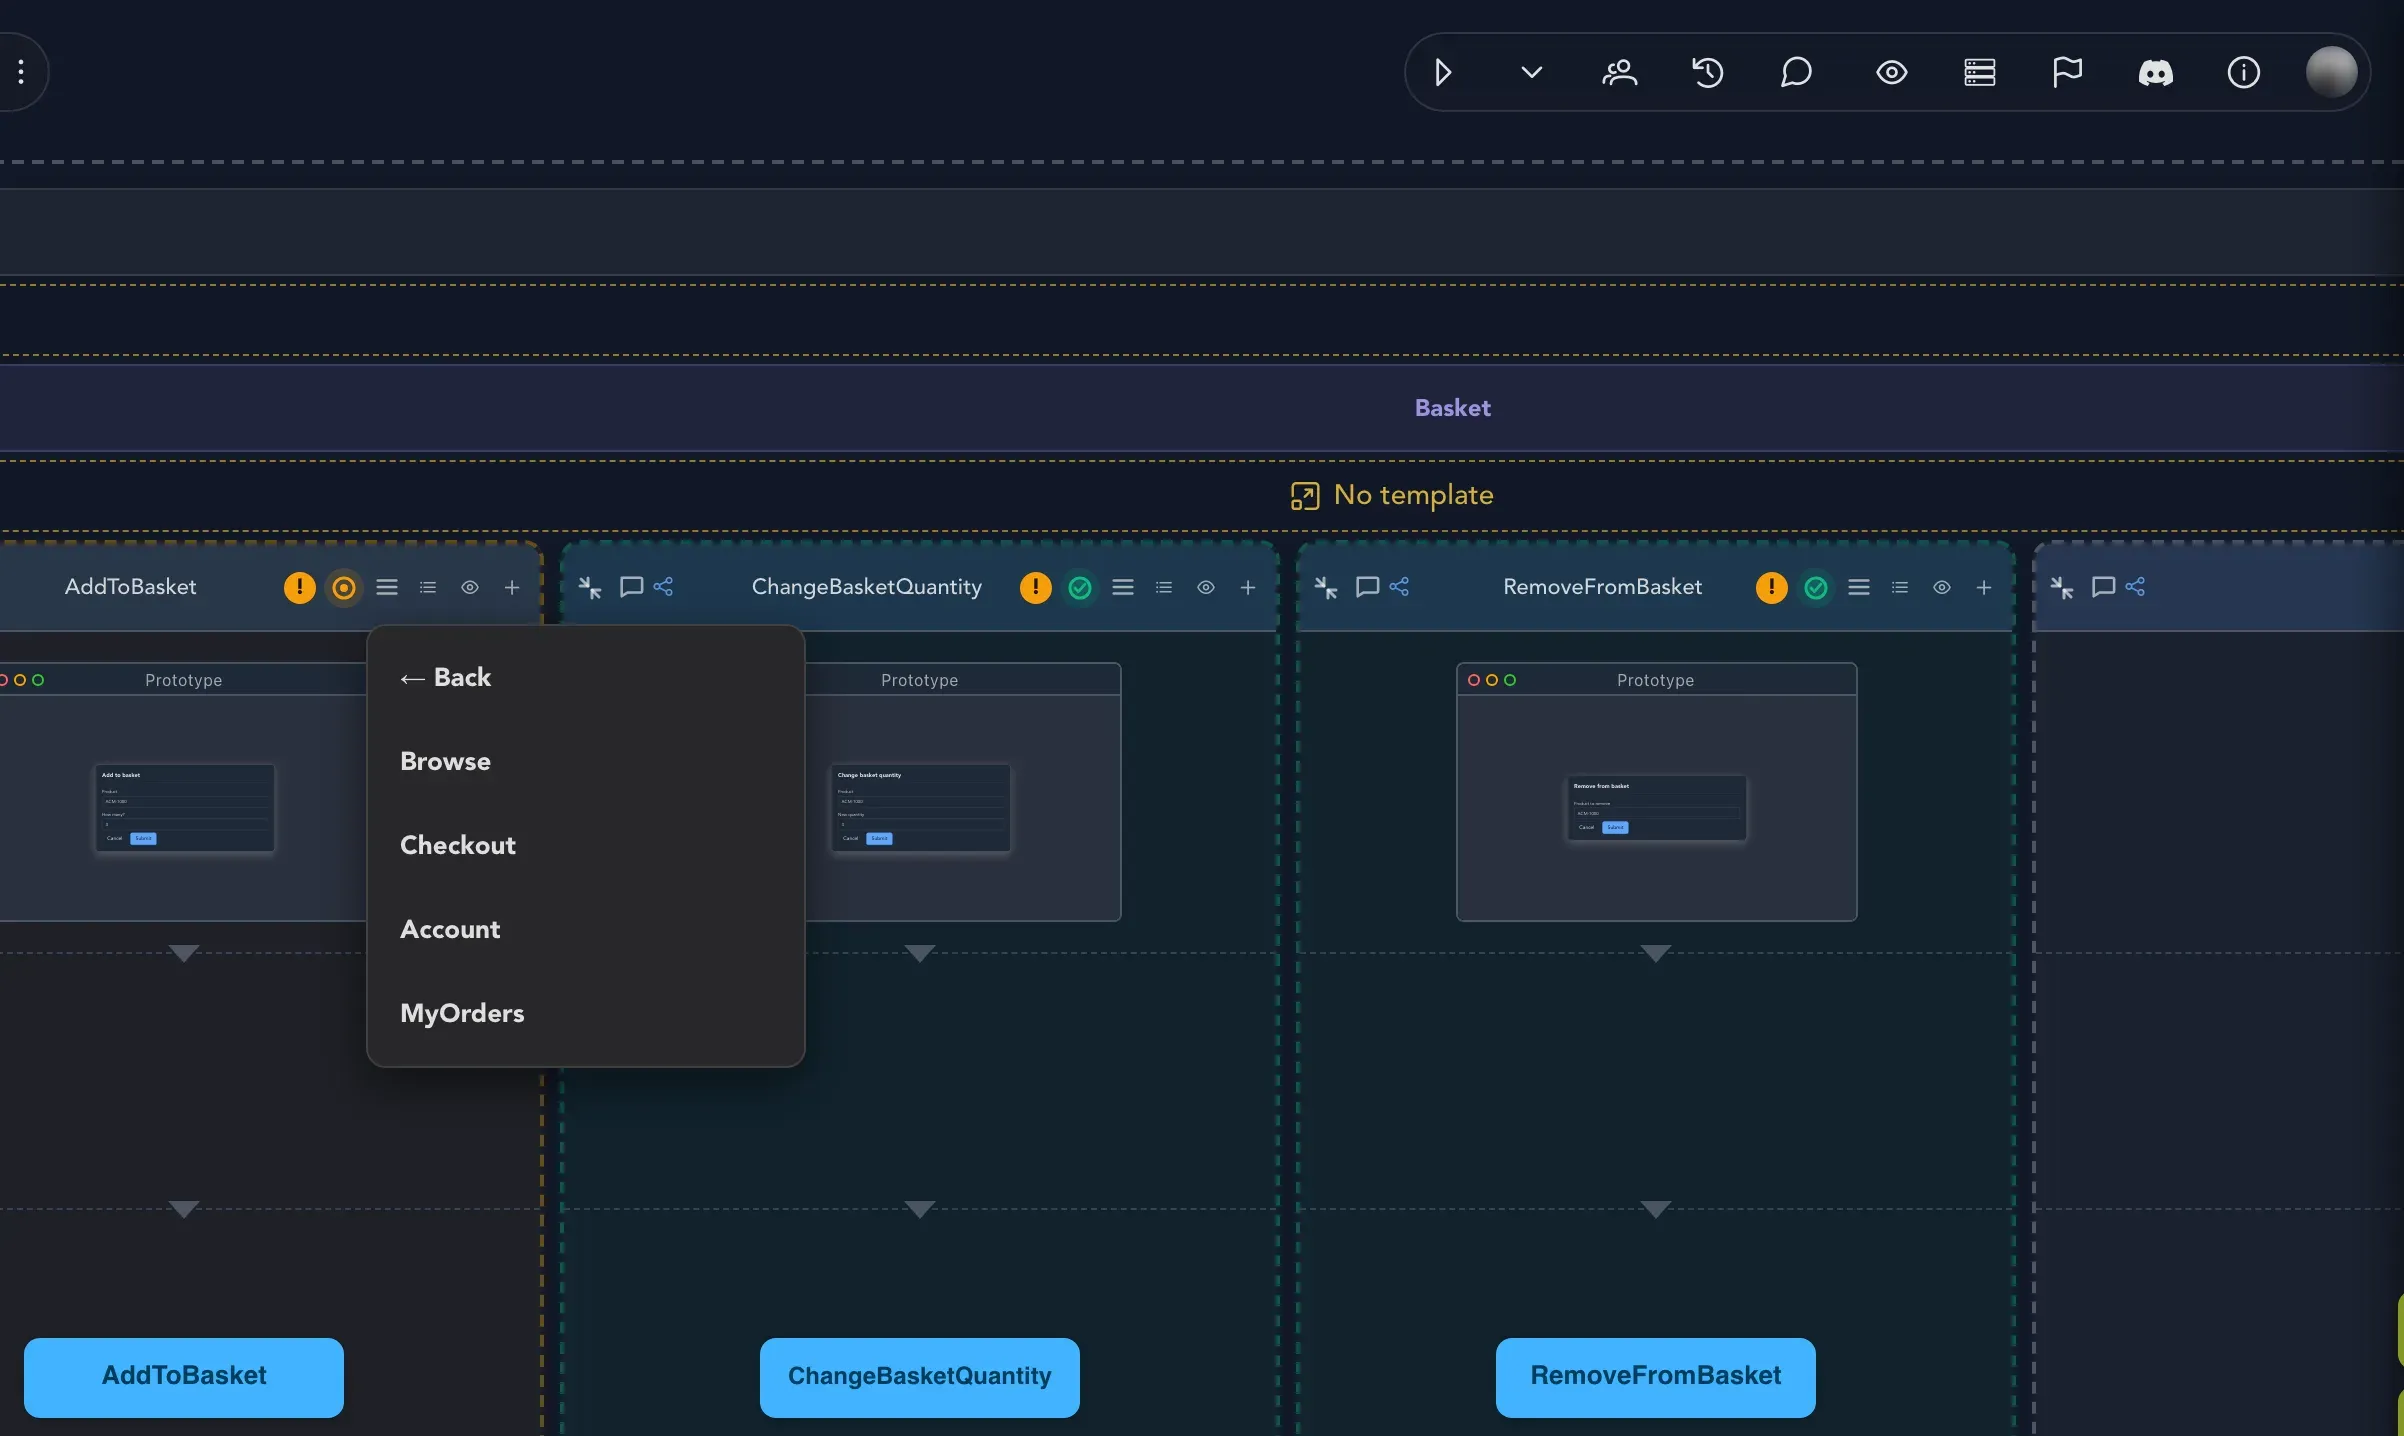
| Move to feature | Move the slice to another feature of the board. |
| Assign to | Give the slice to a team member. |
| Builder | Choose which builder builds the slice. |
| Delete slice | Remove the slice. |
Move a slice to another feature
Section titled “Move a slice to another feature”-
Open Slice options and choose Move to feature.
-
Pick the feature from the list.
Assign a slice
Section titled “Assign a slice”Choose Assign to, then pick a team member. The slice menu offers Reassign and Remove assignee when someone is already assigned. A slice can also be assigned to an AI agent or to the System member. Studio manages the status while a slice is assigned to either. Assigning slices to AI agents is off until AI is turned on for the application: see Project and application settings.
Change a slice’s status
Section titled “Change a slice’s status”Every slice has a status that says how far along it is. Select Change status in the slice header and pick one:
Not started, Draft, Analysis, Ready for implementation, In progress, Ready for review, Done, Blocked and Waiting for user interface. What each one means is on the Statuses and colors page.
Block a slice
Section titled “Block a slice”Choose Blocked. Studio opens Block slice and asks:
- Why can it not be built?
- Questions that need an answer, one per line
Fill them in and select Block. The reason and the questions stay with the slice, and the Progress board lists them. See Track progress.
Check that it worked
Section titled “Check that it worked”The new slice shows as a column in its feature, with its name, its status and its options in the header.
Related pages
Section titled “Related pages”- Commands and rules for the first thing to add to a State Change slice.
- Notes, comments and topics to discuss a slice.
- Slices for the idea behind the four types.
- Track progress to see every slice by status across the project.