

Add actors and choose personas
Every row of a module belongs to whoever does the work in it. That is its actor, and the board always shows who does what. Here you add actors and give them personas. For the idea, see Screens and personas.
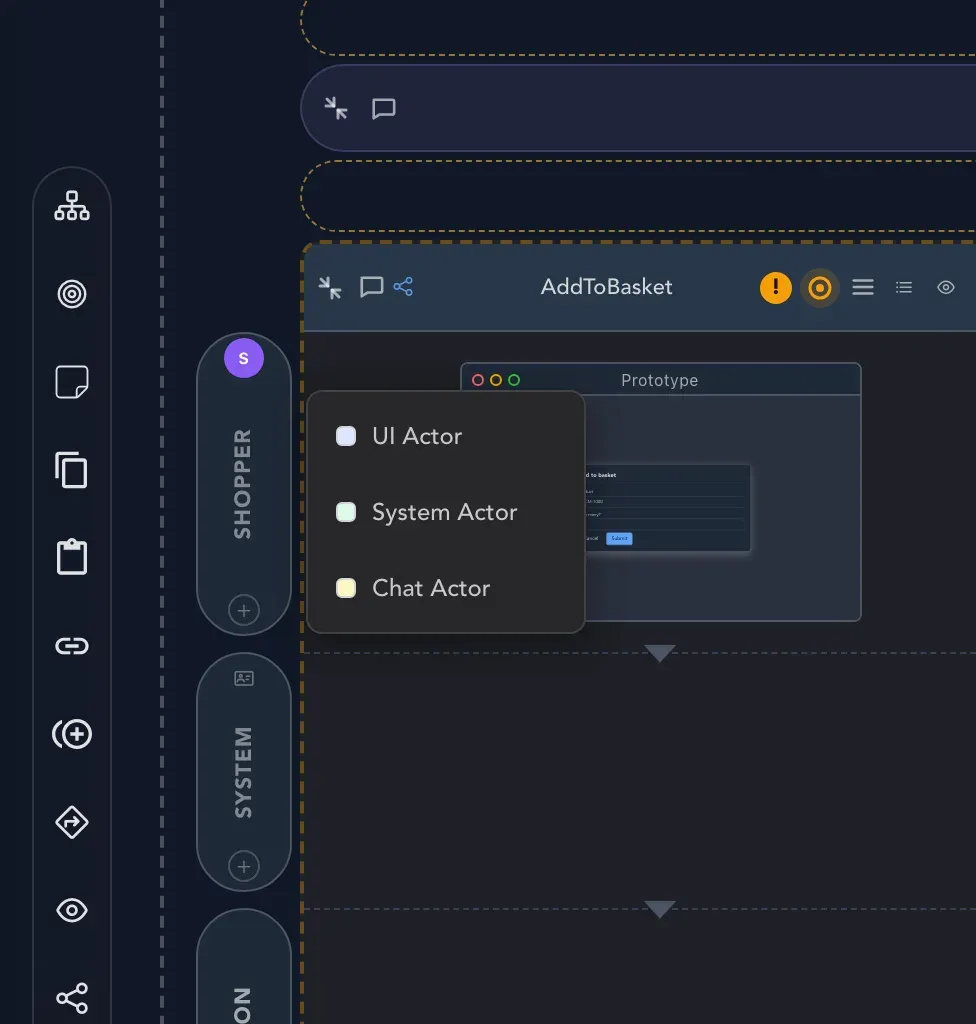
The three kinds of actor
Section titled “The three kinds of actor”| Actor | What it is |
|---|---|
| UI Actor | A person using a screen. Give each persona that owns screens its own row. |
| System Actor | The system itself, for automations. A module has exactly one. |
| Chat Actor | An AI conversation. Unlike the others it has a system prompt, which you edit with Edit system prompt. |
Add an actor
Section titled “Add an actor”-
On the row labels at the left edge of a module, select Add Actor.
-
Choose UI Actor, System Actor or Chat Actor.
Choose a persona for a row
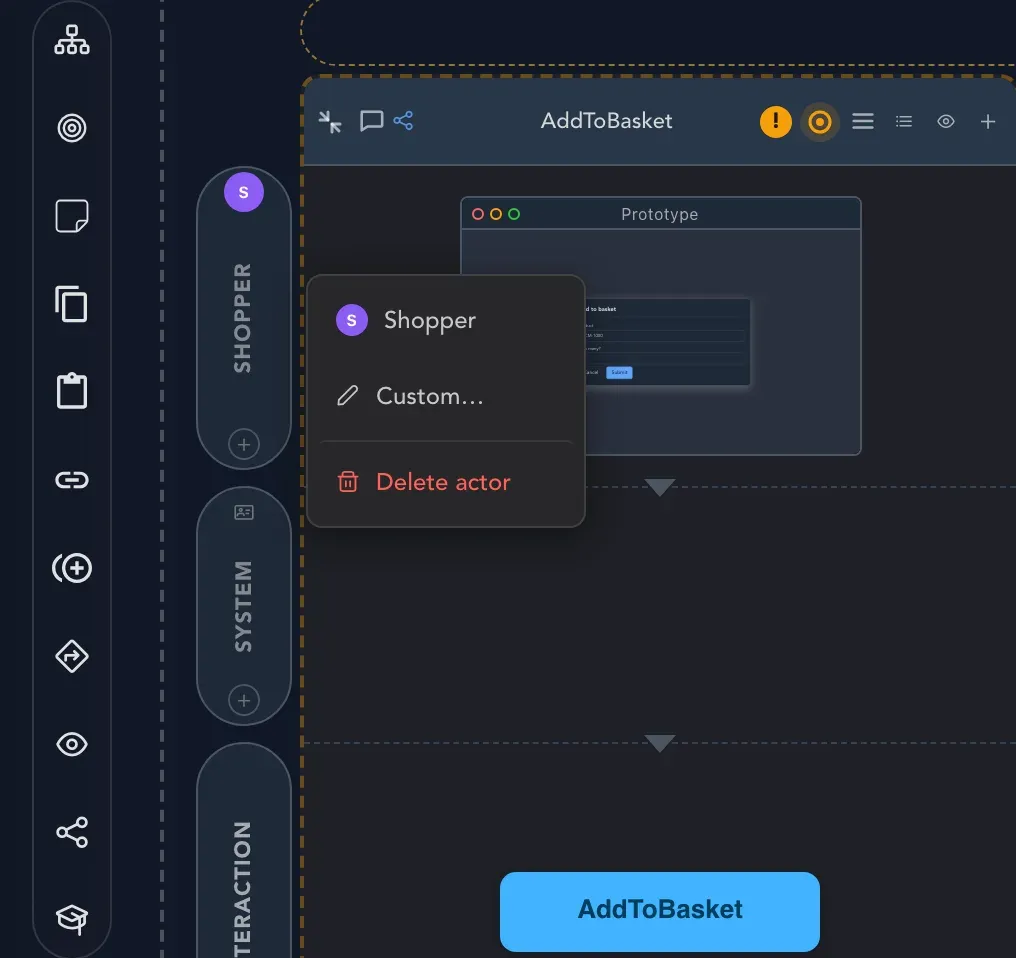
Section titled “Choose a persona for a row”A persona says who the person on a UI row is, such as Shopper, Merchandiser, SalesRep, SalesManager, Buyer or WarehouseClerk. Personas come from the domain’s personas canvas.
-
On the row label, open Choose persona.
-
Pick a persona from the list, for example Shopper. To use a name that is not on the canvas, choose Custom….
-
To change the description or, for a chat actor, the system prompt, use Edit persona description or Edit system prompt.
Remove an actor
Section titled “Remove an actor”Open Choose persona on the row label and choose Delete actor. If the actor has screen content on any slice, Studio warns you that deleting it removes that content too.
Check that it worked
Section titled “Check that it worked”The row label shows the persona’s name, such as Shopper, and the slices on that row are the ones that person uses.
Related pages
Section titled “Related pages”- Screens and personas: the idea behind actors.
- Check the model: see what each role is offered.
- Personas: where personas are defined.
- Screens on slices: the screens a UI row owns.